
Managing your expenses efficiently is crucial, and OfficePortal makes it simple to claim reimbursements. Whether you attended a business event or made an office-related purchase, you can easily raise an expense claim and get reimbursed. Below is a step-by-step guide to help you through the process.
Step 1: Navigate to the Expenses and Reimbursement Section
First, log in to your OfficePortal account. On the dashboard or the menu, look for the Expenses and Reimbursement option. Click on it to access the expense management section.
Step 2: Create a New Expense Request
Once you’re in the Expenses section, you’ll see an Add New button. Click on it to start a new expense claim request.
Step 3: Provide Detailed Expense Information
Here’s what you need to fill in:
- Expense Category: Choose the appropriate category from the dropdown menu. This helps your organization track expense types.
- Amount: Enter the exact amount spent for the expense.
- Merchant’s Name (Optional): If applicable, you can provide the merchant’s name for easy reference.
- Date of Expense: Select the date when the expense occurred using the date picker.
Step 4: Attach Supporting Documents (Optional)
Supporting documents strengthen your claim. You can attach files such as:
- Purchase Bills: Upload a scanned copy or photo of your purchase bill.
- Wait Receipts: Attach any relevant wait or service receipts. To upload, simply click the Attach File button and select the appropriate files.
Step 5: Save or Submit the Request
- Save: Click this if you need to edit or review the request later.
- Save and Submit: Select this option when you’re ready to send the claim for approval to your reporting manager.
Step 6: Keep an Eye on Claim Deadlines
Some organizations have a cut-off date for reimbursement claims. Make sure to submit your request before this date to avoid delays or rejections. Check your company’s policy for specific details.
By following these steps, you can ensure your expenses are reimbursed without any hassle. Happy claiming!
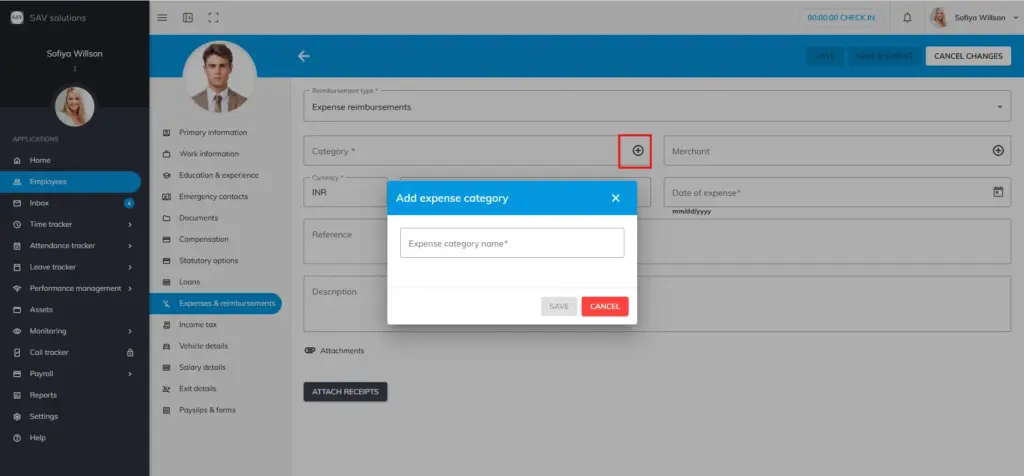
How to add a new Expense Category instantly? #
If you want to add a new expense category instantly, apart from existing ones, Click the “+” icon and enter the “Expense category” name. Then hit the “Save” button to save it and then you can use this expense category.
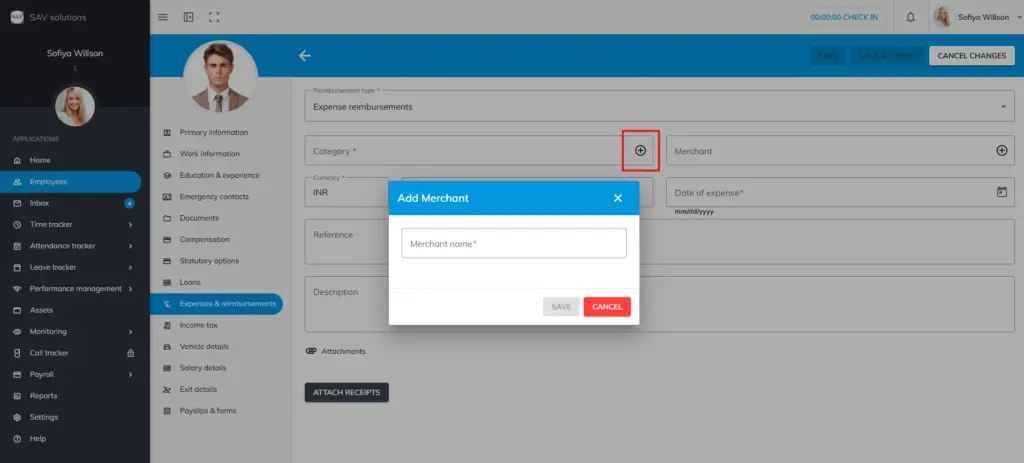
How to add a new Merchant instantly? #
If you want to add a new merchant instantly, apart from existing ones, Click the “+” icon and enter the “Merchant name.” Then hit the “Save” button to save it and then you can use the merchant that you have added.
Please note: You can add new expense categories and Merchants under Playfield Settings, in Payroll Settings.


