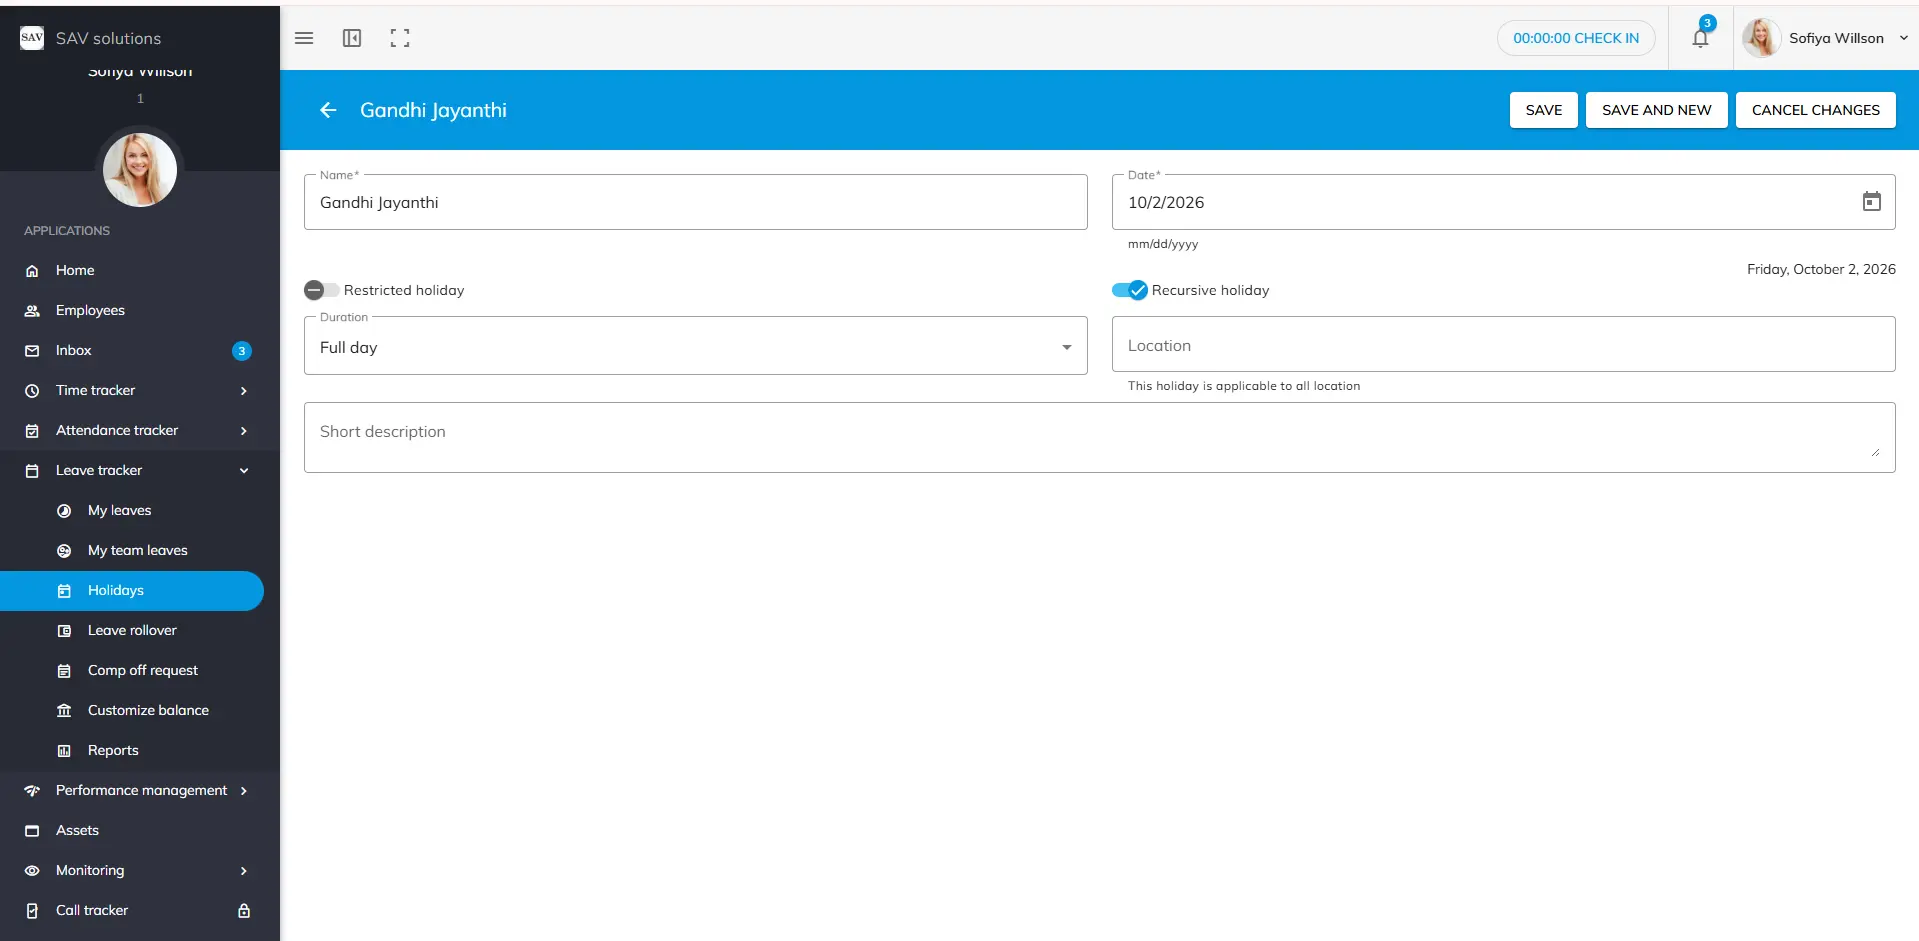
Enable this toggle if the holiday is a restricted holiday. Unlike regular holidays, where the day off applies to everyone automatically a restricted holiday requires the employee to apply for leave and get it approved by their reporting manager.
If your organisation follows this concept, ensure that Restricted Holiday is added as a leave type in your Office Portal account and that employees are assigned a restricted holiday leave balance. For example, Muharram can be marked as a restricted holiday, allowing employees who observe it to apply for leave using their restricted holiday balance.
Enable this toggle to automatically mark the same date as a holiday every year. For example, if Indian Independence Day is set as a recursive holiday, it will be added automatically each year without any manual effort.
Step 4: Select whether the holiday is a Full Day or Half Day. If Half Day, specify whether it applies to the First Half or Second Half of the day.
Step 5: Select the branch or region the holiday applies to. If left blank, the holiday will apply to all employees across the organisation, regardless of their location.
Description: Optionally, add a short description for the holiday. This field can be left blank if not required.
We use third-party services to give you the best user experience and to continuously improve it, however we will not sell your data to any one. These services use cookies. In order to be able to use these services, we need your consent first. I agree and can revoke or change my consent at any time with effect for the future.