For a visual walkthrough, watch our tutorial video below.
How to add Assets in the OfficePortal? #
Navigate to Assets Feature in OfficePortal
- Click on the Add New Button on top
- As soon as you click on the “add new” button, you can view a form to add the asset details. Fill in all the mandatory details like Asset Name, Serial number, Category and Purchased-on.
- Asset Name: To quickly identify the asset, you can enter the unique asset name.
- Serial number: You can update the unique serial number for every asset.
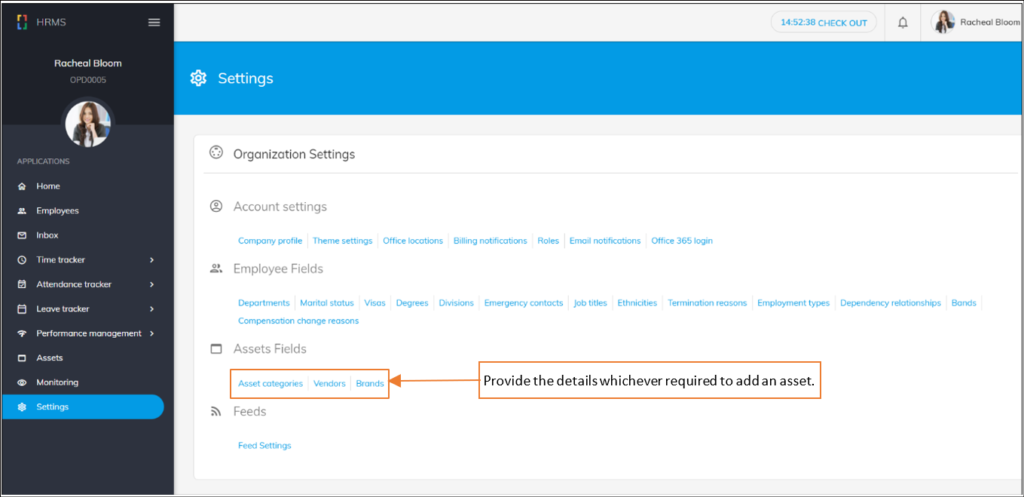
- Category: Under category, you can choose the category for the asset you are adding, such as laptop, mobile phone, desktop, printers, etc. If the category you are looking for is not available, then you can add the asset category by clicking on the “+” button provided near the category field or under Settings > Asset fields> Asset categories
- Asset id: Enter the unique asset id for each asset for easy reference. Otherwise, we will automatically generate the asset id based on the asset category.
- Brand: You can choose the brand for the asset you are adding, such as HP, Dell, Mac. If the brand you are looking for is not available, then you can add the brand by clicking on the “+” button provided near the brand field or under Settings > Asset fields> Brand
- Vendor: You can also choose the vendor for the asset you add, such as Chroma, Dell, Mac. If the vendor you are looking for is not available, then you can add the vendor by clicking on the “+” button provided near the Vendor field or under Settings > Asset fields> Vendor
- Location: You can choose the location of the asset where the asset is located or going to be located, such as Mumbai, Delhi, Dubai, UK. If the location you are looking for is not available, then you can add the location by clicking on the “+” button provided near the Location field or under Settings > Account settings > Office locations
- Purchased on: It is mandatory to add the date on which the asset is purchased.
- Warranty ends on: You can even update the warranty end date to record the warranty period of the asset.
- Status: The status of the asset can be updated as follows:
- If the asset is functioning well and is in good condition, you can select the status as “In-stock”.
- You can choose the status “Under maintenance” for such assets which are not in working condition and require maintenance/service.
- In case the asset is either missing or lost, you can select the status “Missing”.
- If any asset is old and worn out and can no longer be used by the organization’s employees, you can choose the status as “Retired”.
- By transit, we mean the transferring asset from one place to another. You can choose the status as “In-transit” under two circumstances.
- If the organization transfers the asset to the employee or the employee returns the asset to the organization.
- The vendor sends the asset to the organization in case of a new purchase; you can choose the status as” In-transit” until the asset reaches the employer.
Note: You cannot select the status as “In-use”. The asset status will be automatically moved to “In-use” if you assign the asset to the employee.
- Description: You can update a short description of the asset, including the details/properties.
Once you enter all the details about the asset, you can click on the “Save” button to Save the asset or Click on “Save & New” to save & add another asset in the “OfficePortal”.
Once the asset is created, the barcode sticker is automatically generated. If you click on the “Print” button, you can view the asset id below the barcode sticker. You can print that sticker and can be affixed to the asset for tracking. Once the asset is created, the barcode sticker is automatically generated. If you click on the “Print” button, you can view the asset id below the barcode sticker. You can print that sticker and can be affixed to the asset for tracking.


